I often ride my Motoped after the sun goes down (I work at night) so need lights. I had been using a Magicshine 808 bicycle light with its own battery pack for a headlight and a Planet Bike Super flash for the rear. I wanted something brighter and self contained so I didn’t run out of battery power if I forgot to charge or replace batteries. So to keep the wiring as simple as possible I started out with Halogen lights and just an AC Rectifier. The headlight is a Trail Tech X2 Universal Halogen and the Regulator is the Trail Tech AC Regulator with a Trail Tech 3 Position switch/harness which takes care of a lot of the wiring.
This doesn’t need a battery and has the simplest wiring. Just black power lead from the switch to the frame ground and the red to the lighting wire from a Ricks Motorsports Lighting Stator, then connect the regulator in parallel between red and the frame ground. Plug the light into the connector on the switch harness and all done. (I didn’t get into the two lights for the diagram, that’s taken care of by the switches harness which just needs the two connections which are shown)

Unfortunately the lighting coil on the stator is unable to provide the 70 watts needed when both bulbs in the X2 are turned on. Ricks stator is rated for 90 watts, but that’s at higher RPM’s and they say to keep lighting to around 55 watts. But even with just one bulb (35 watts) I wasn’t happy with the brightness of the Halogens.
This video shows all the parts, their installation and a quick ride at night showing the light in action.
Next plan was to go to HID’s which are brighter for the same current draw. I purchased the Ballasts and Bulbs from Trail Tech to fit the X2 housing and was just going to run them one at a time (30 Watts for small top bulb and 40 Watts for Bigger lower bulb). For this I’d need to convert over to a floated ground DC lighting circuit.
The ricks stator has one lighting lead, to float the ground/use DC you need to disconnect the grounded side of the lighting coil and attach it to another wire, running it outside the case along with the original wire. I’ve done that on other stators in the past, but instead of trying it with the Ricks stator I just purchased a Baja Designs CRF50 Stator which comes with the two lighting leads and is also rated for higher power (110 Watts).
You can see the difference in the wire thickness between Ricks and Baja stators (Baja on right mounted to motor).

I had two issues with the HID’s. First is that they take a while to reach full brightness so switching between high and low I’ll have a period without much light. Second is that because they are in the same housing they point in the same direction. This wasn’t a problem with the Halogen bulbs because the low wasn’t that powerful, but the HID’s are a LOT brighter so if I aim them up for off road I’ll be blinding oncoming drivers even with only the small bulb turned on. If I aim them down then I waste a lot of light for off road illuminating the ground.
While deciding what to do I started installing a DC lighting circuit (I knew I’d need DC whether I ran HID or LED).
First I made a new mounting plate for the CDI and Coil. The CDI is aftermarket from Trail Bikes which I got in a 88cc Big Bore Kit for the Honda CRF50 engine. The Coil and Harness are stock CRF50F.
This is the CAD drawing, the Coil is mounted sideways to keep the plate as short as possible to clear the battery mounting tabs on the Motoped frame.

Cut that out on my G0704 Mill


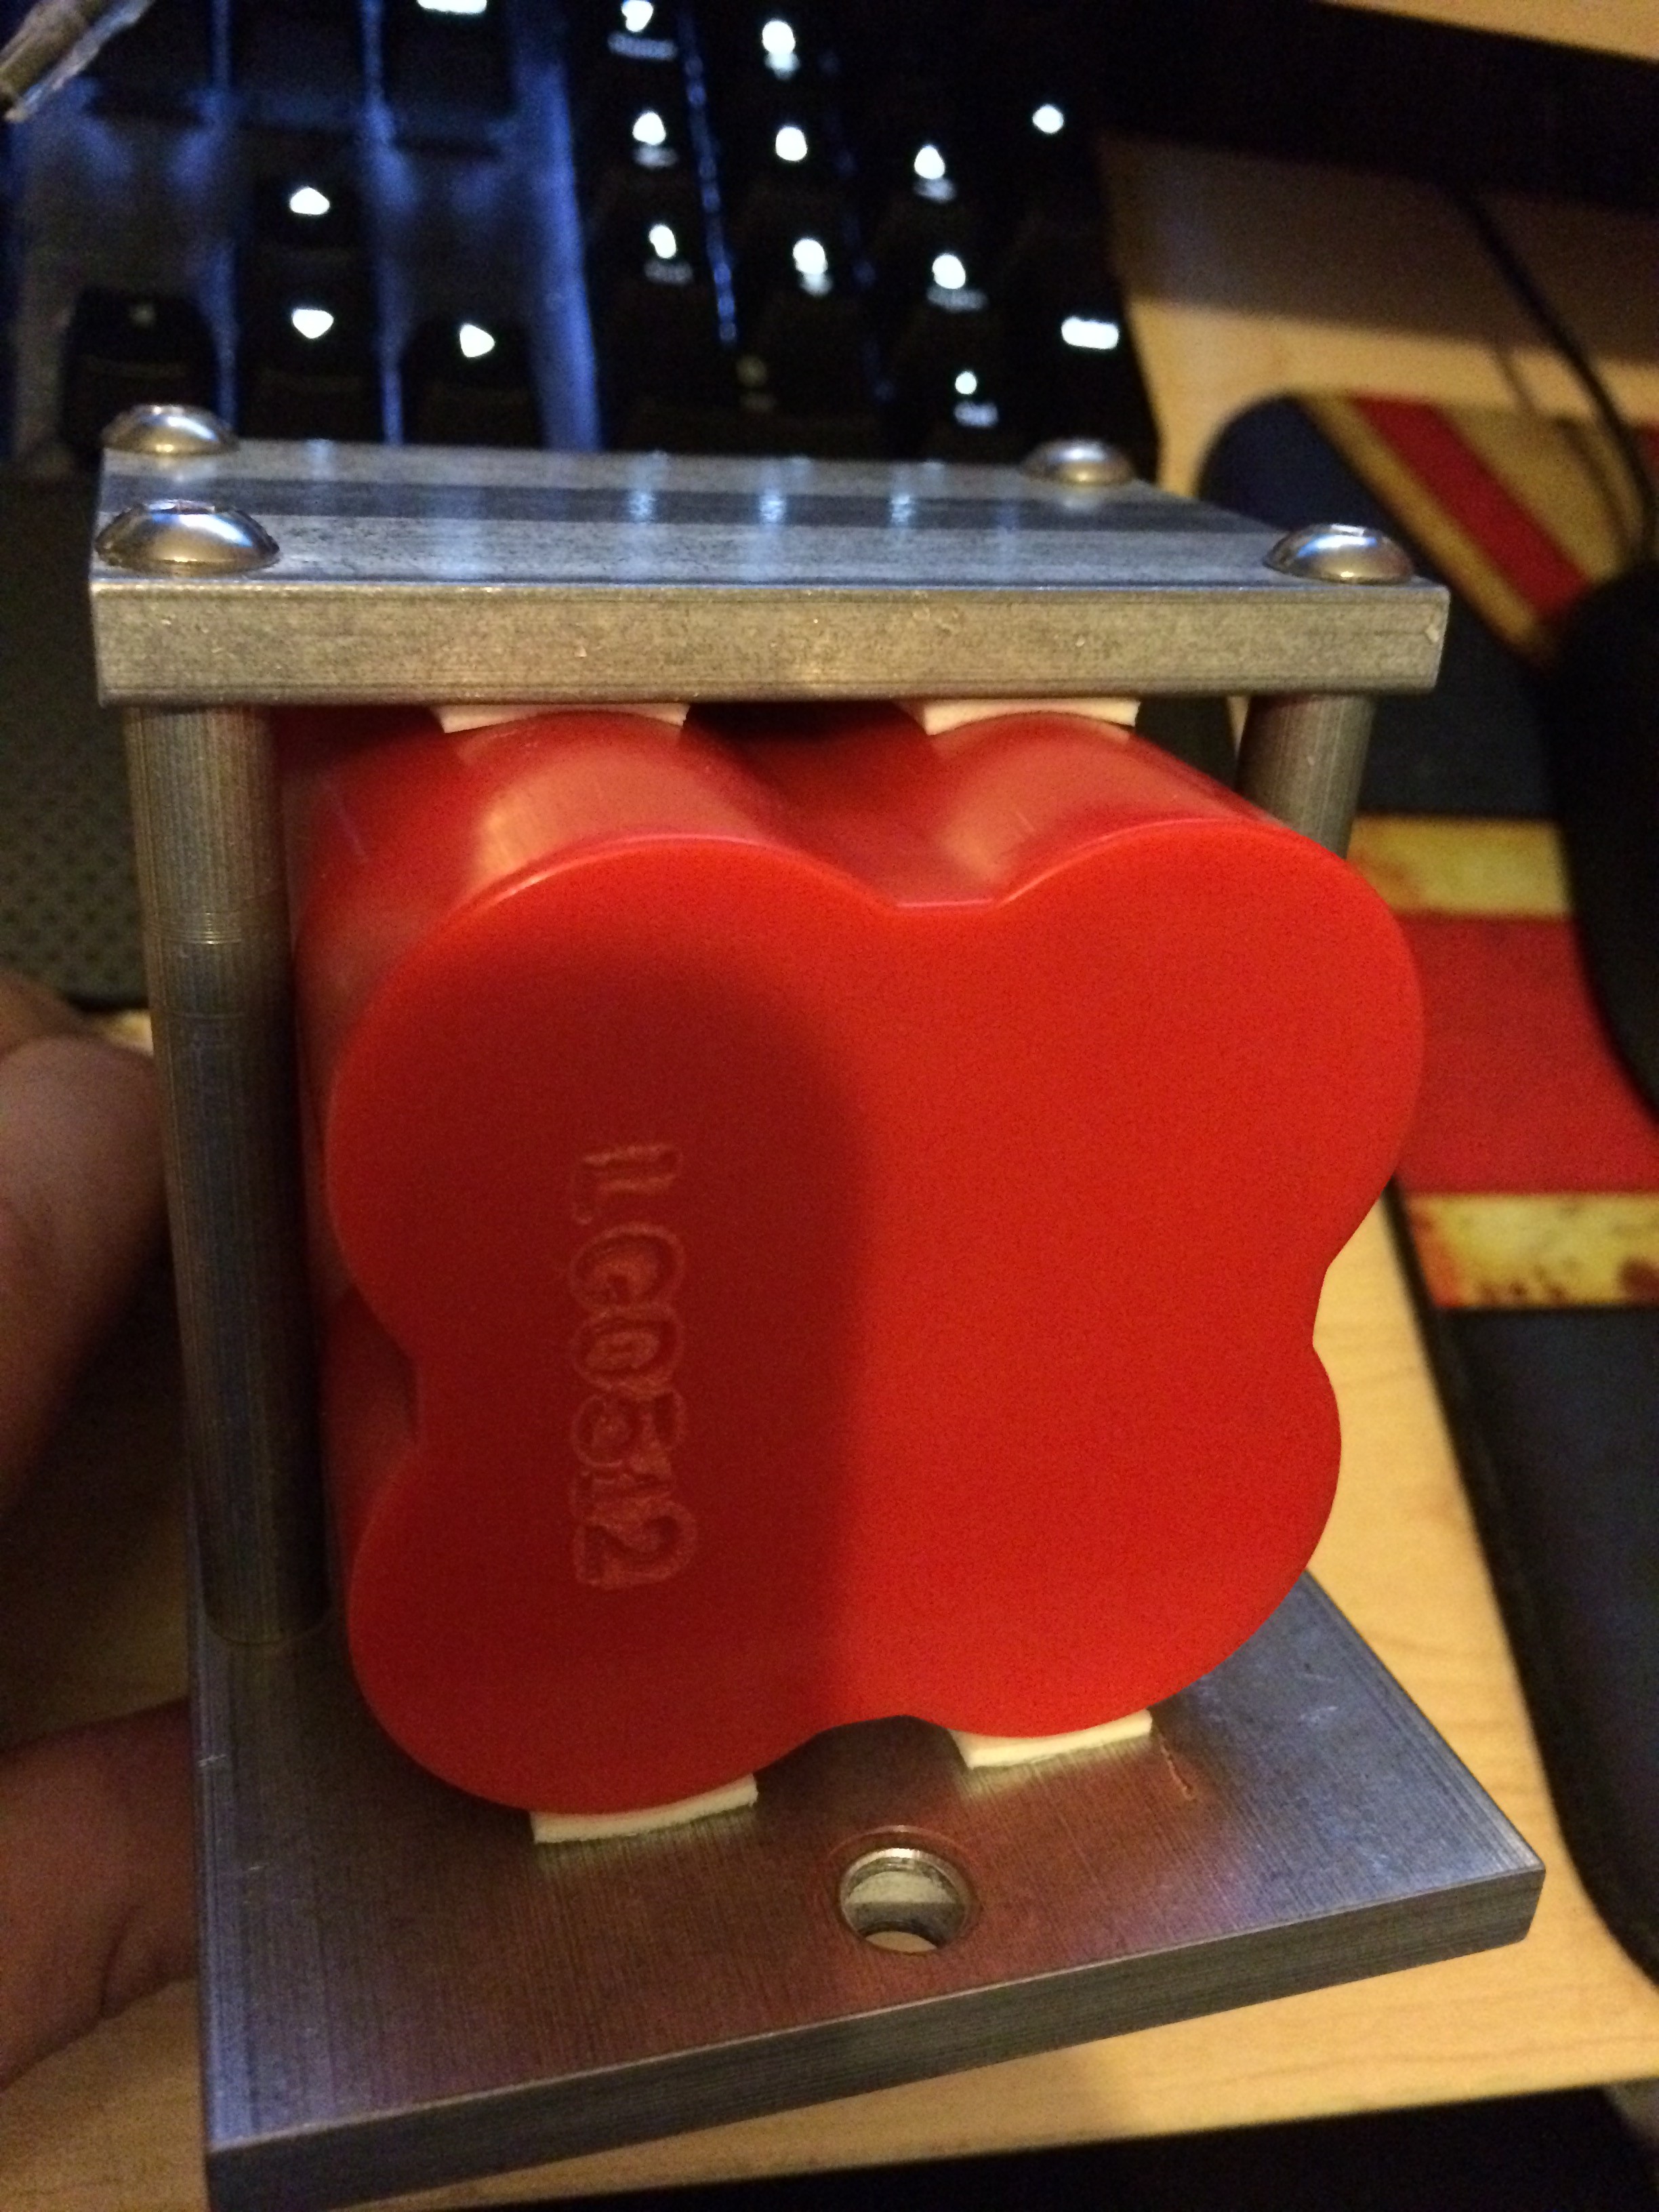
I’m using the Trail Tech Regulator/Rectifier which needs either a Capacitor or a Battery to function properly. I have a Puch Magnum which I just used a Capacitor (4700pF), but wanted a Battery for the Motoped to keep the lights working properly at idle and to allow lighting when the engine is off. I saw someone else on the Motoped Build/Ride Facebook page had used a Ballistic Evo2 4 cell and it seemed to be a good fit and a lot lighter than the 4Ah battery I had laying around.
I made a cradle for the Battery and the Regulator which attaches to the mounting lugs on the frame
Top section which attaches to frame and mounts the Regulator.
And the lower that keeps the Battery in place (has 3m double sided tape to keep it from moving).

The two plates are attached using four 0.309″ rods cut to length to take into account the battery and a layer of the 3m tape with each end threaded for 10-32 bolts.


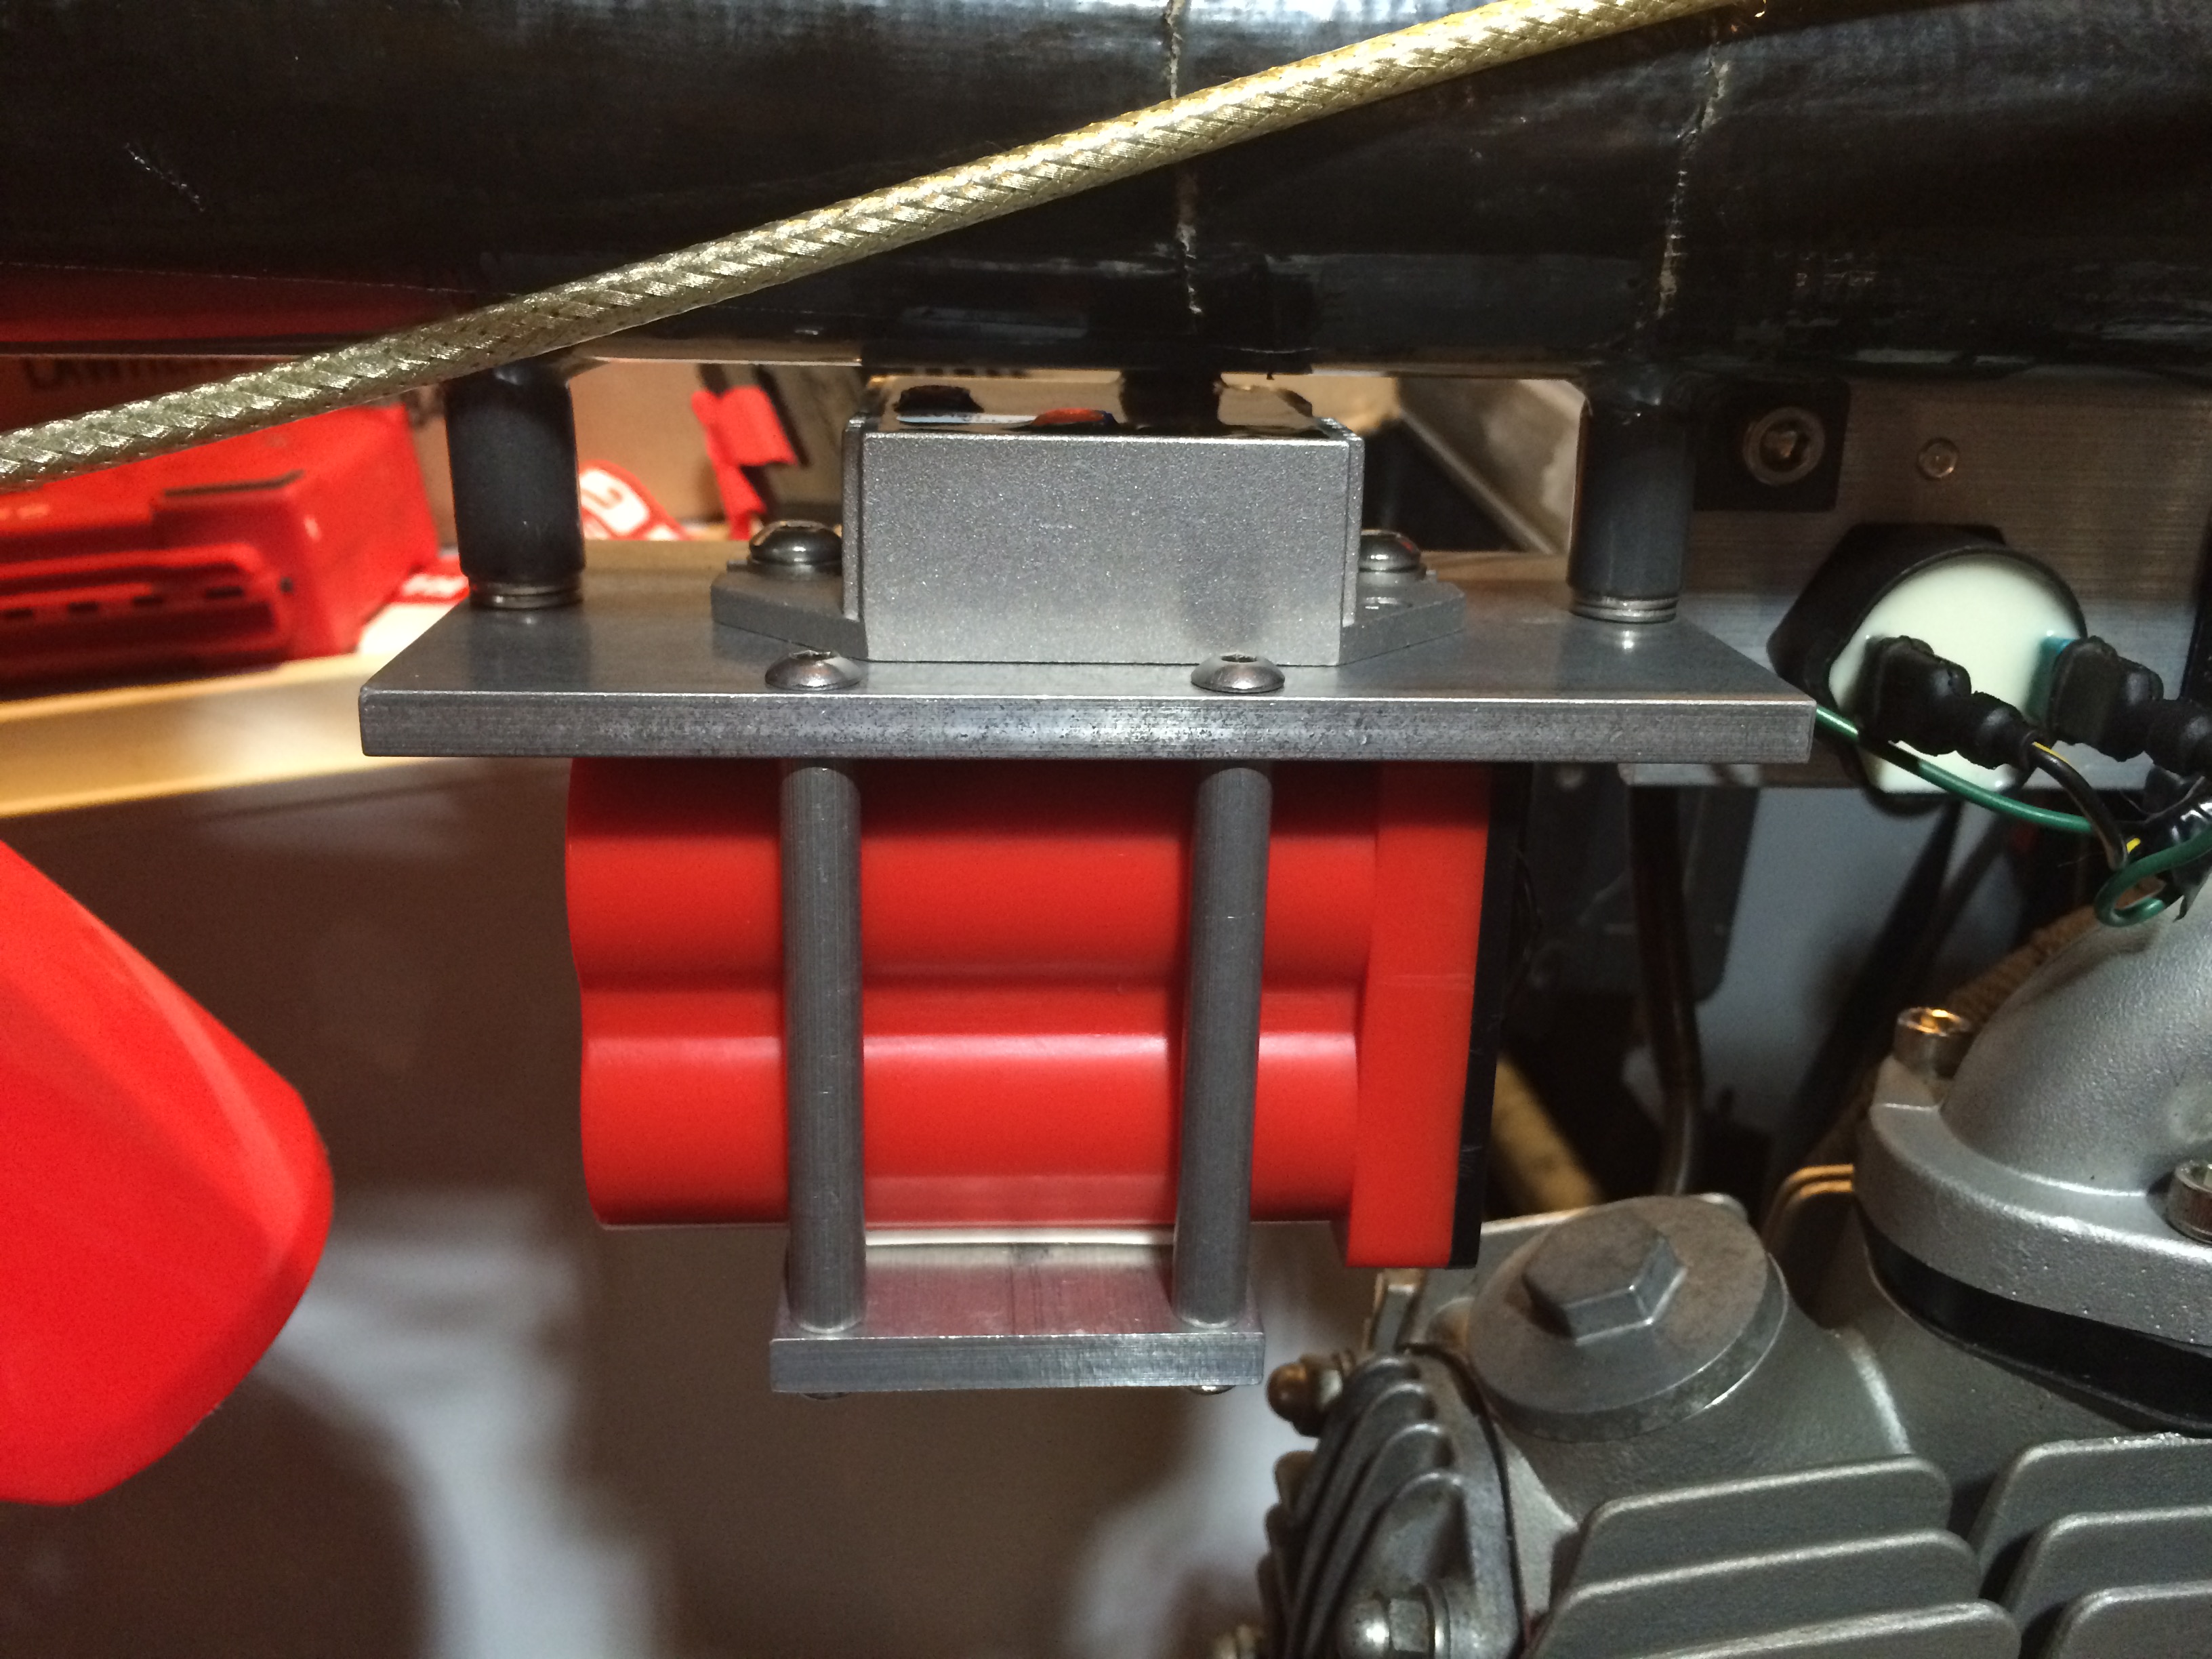
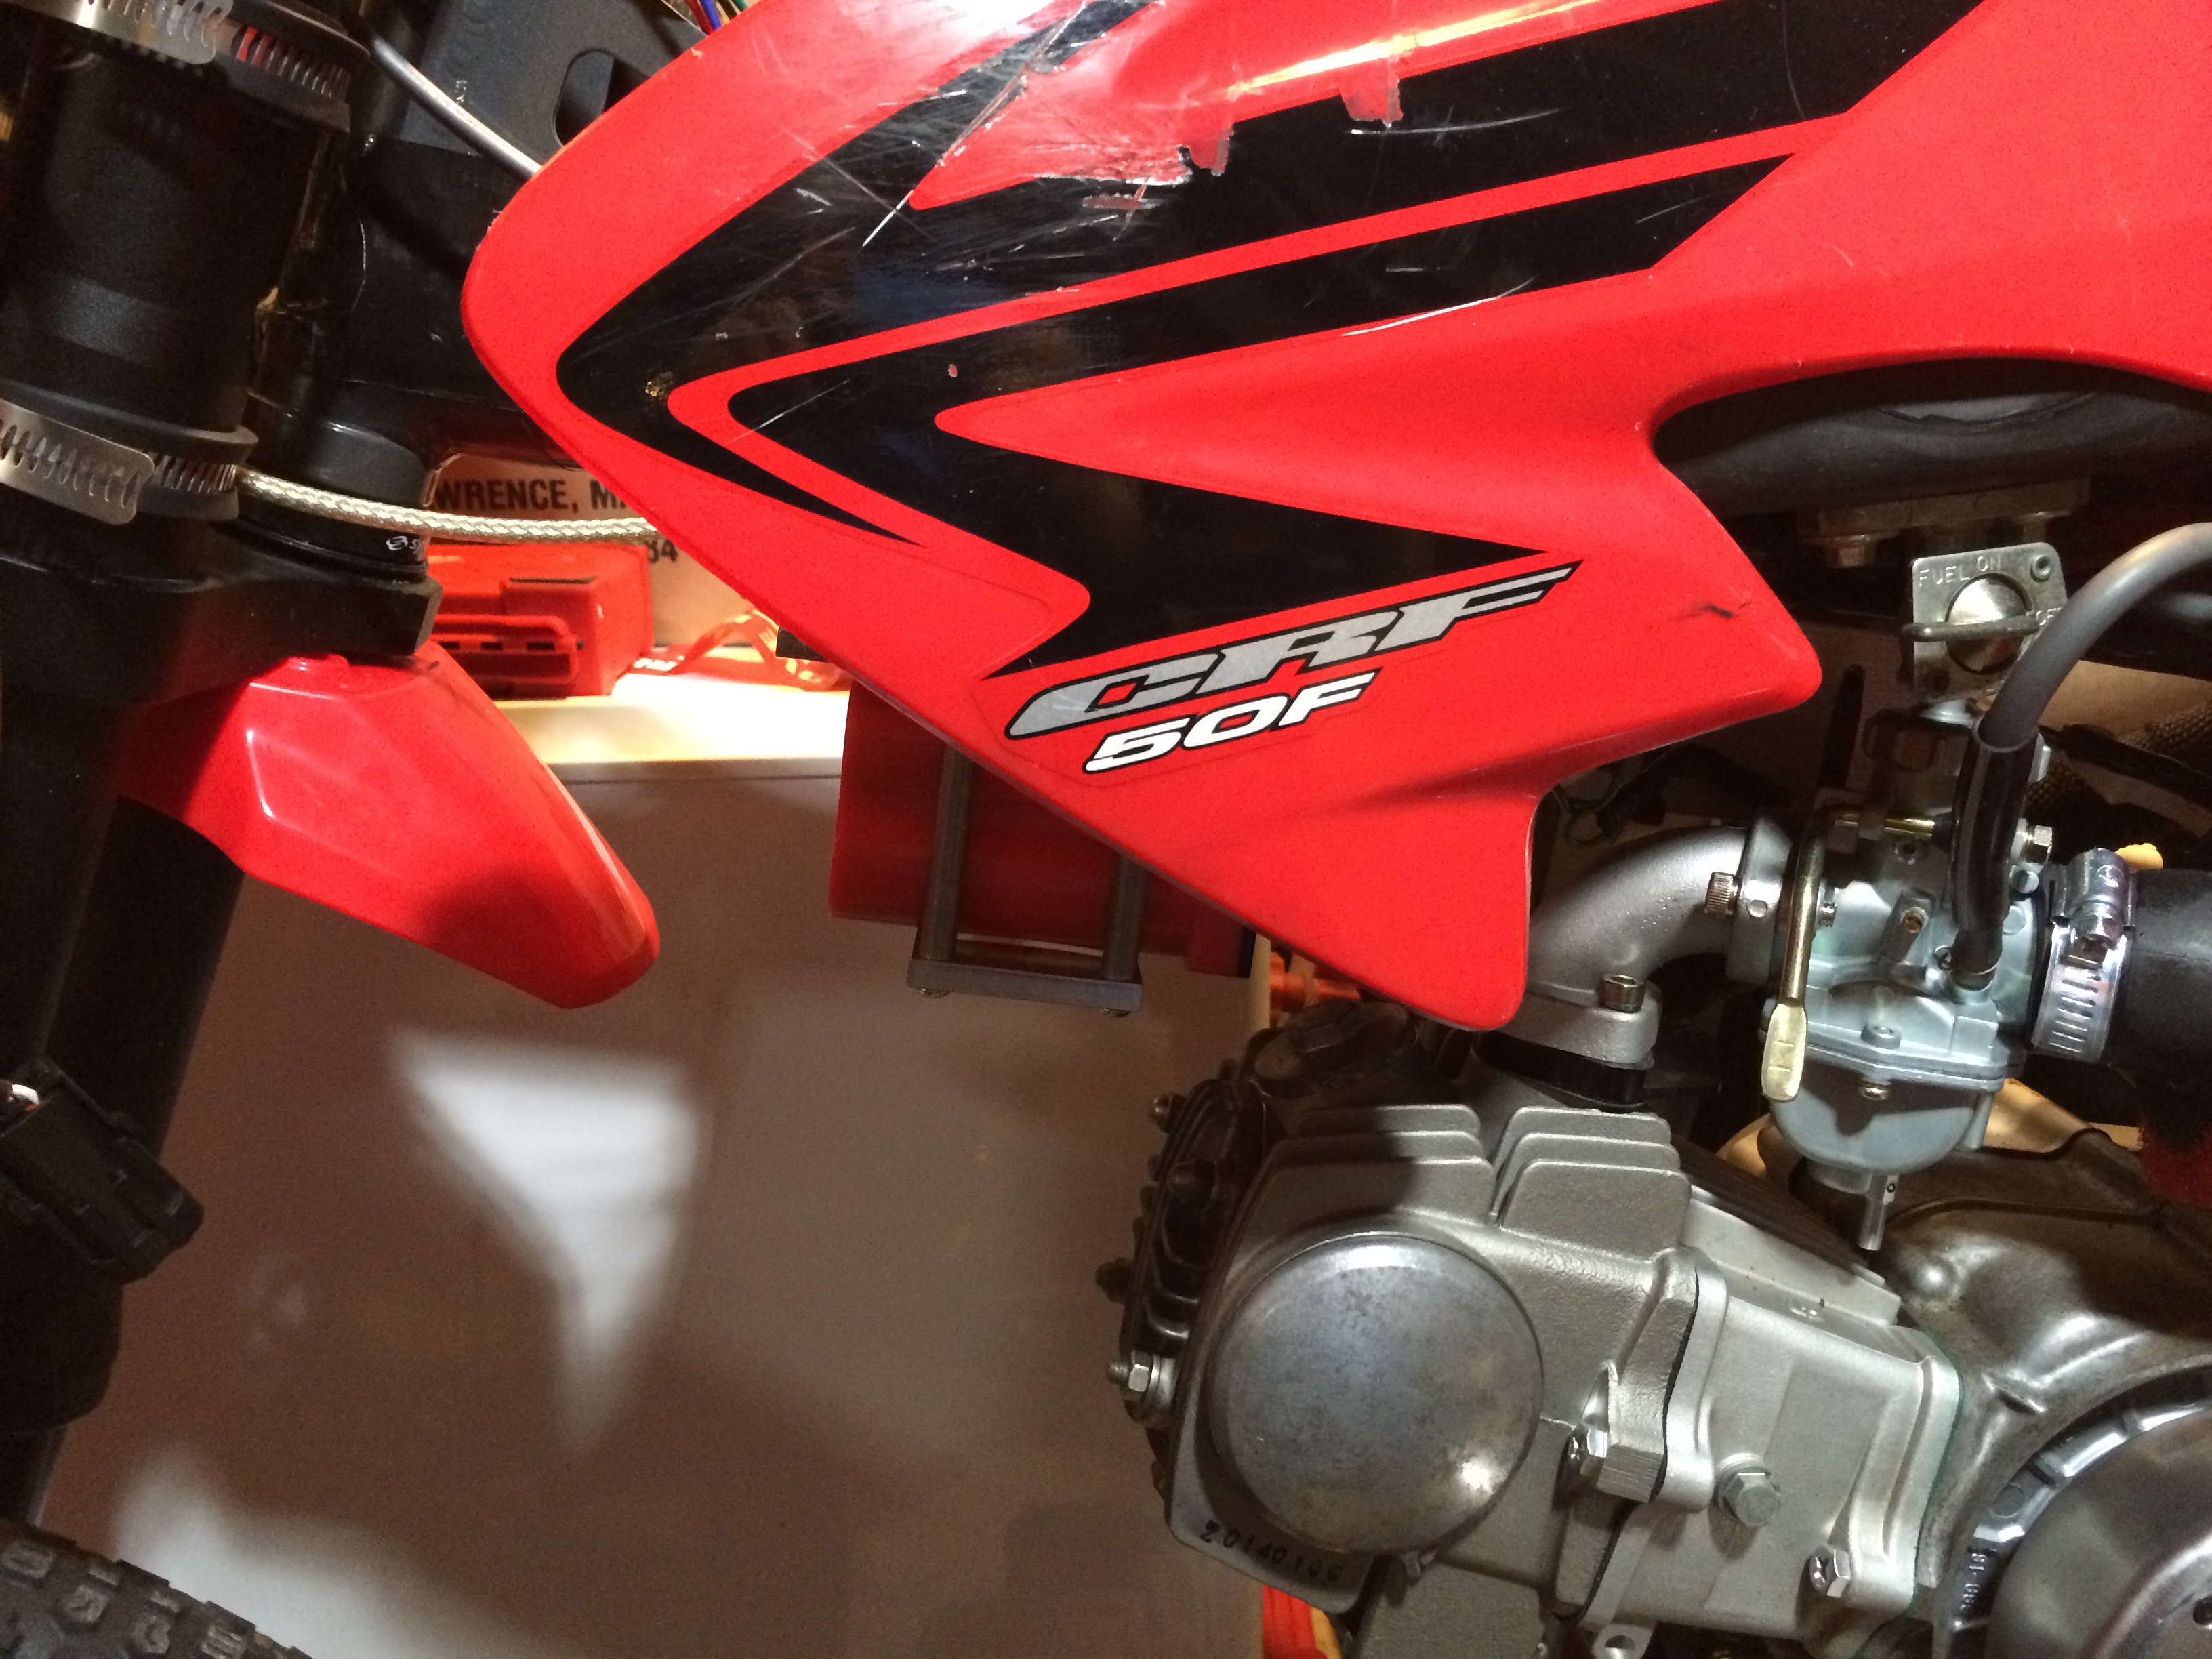
It fits the space pretty well, closer to the engine than I would have liked – but after a few rides it didn’t get warm from the engine. Tank shrouds cover it up pretty well
While on the Baja Designs website I noticed two LED lights – the SII and the Squadron. Running two separate lights lets me aim each one where I want. Can have one as a Low beam pointed down for the road and the other relatively parallel with the ground as High for off road. Being LED they don’t have a warm up period like the HID. As a bonus they draw a little less current, are brighter and should last longer than HID.
I decided to get those along with a Motorcycle mounting bracket that Baja sells for their Fuego lights.

This is the plate, the middle three holes are to attach to the above bracket, the outer elongated holes are for the Fuego Lights.

Fuego lights are 4″, the SII and the Squadron are smaller so I had to cut the ends off the plate and drill a couple new holes to match the lights I’m using and countersink the two holes for attaching to the bracket so the bolts didn’t stick out.

The bracket sides had to be bent inwards because its designed for a Motorcycle and the forks I’m using are much narrower. Also had to make room for a 3/8″ bolt at one end for the Squadron base bolts.

You can see the curve in the sides where I bent the bracket in the photo below.

It uses hose clamps with silicone sleeves to attach to the forks.


For a rear light I’m using a Universal LED Tail/Brake Light. My Motoped is registered as a Moped, which in my state doesn’t need a brake light – Just rear facing red so I don’t have a brake light switch connected to the third wire.
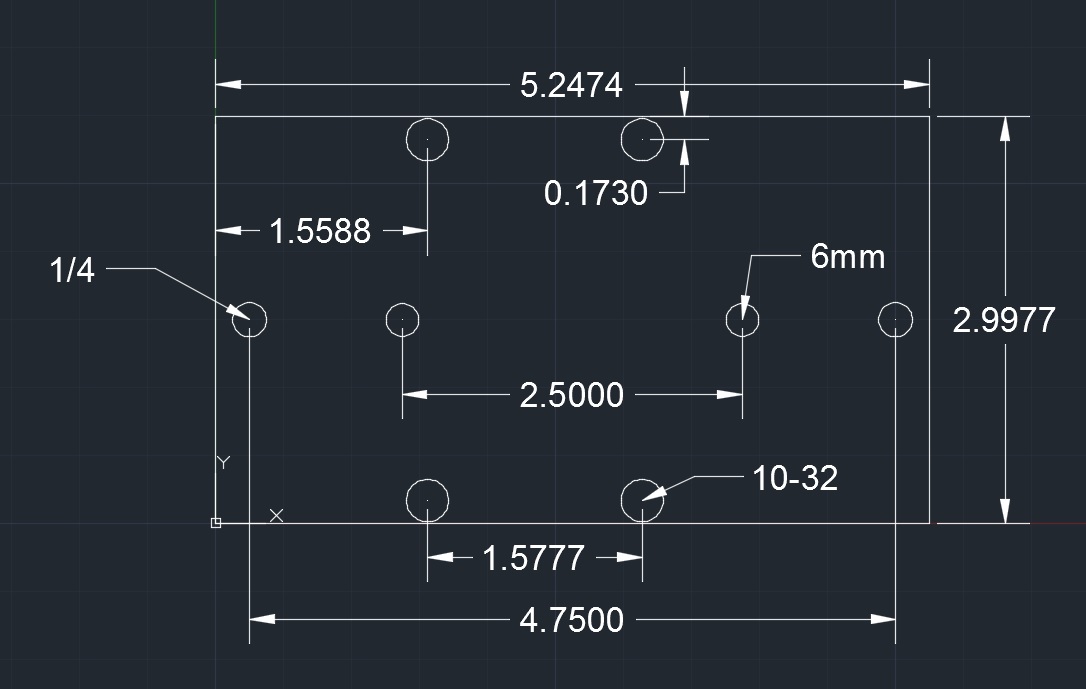
Cushioned 5/8″ clamp’s attach a 1/2 Diameter by 4.15″ rod (with 1/4-20 bolts) to the sub frame and then two holes (6mm) to attach the LED and a piece of aluminum bent at a slight angle for the registration sticker.


Because I plan on running the bike with either the SII or the Squadron and not both I replaced the Trail Tech 3 Position Switch/Wiring Harness which is Off, Low, Low & High with just the plain Trail Tech 3 Position Switch which is Off, Low (Green wire), High (Yellow wire). The Blue wire is on in any position other than off so that’s used for the tail light so anytime either front light is on, so is the rear.
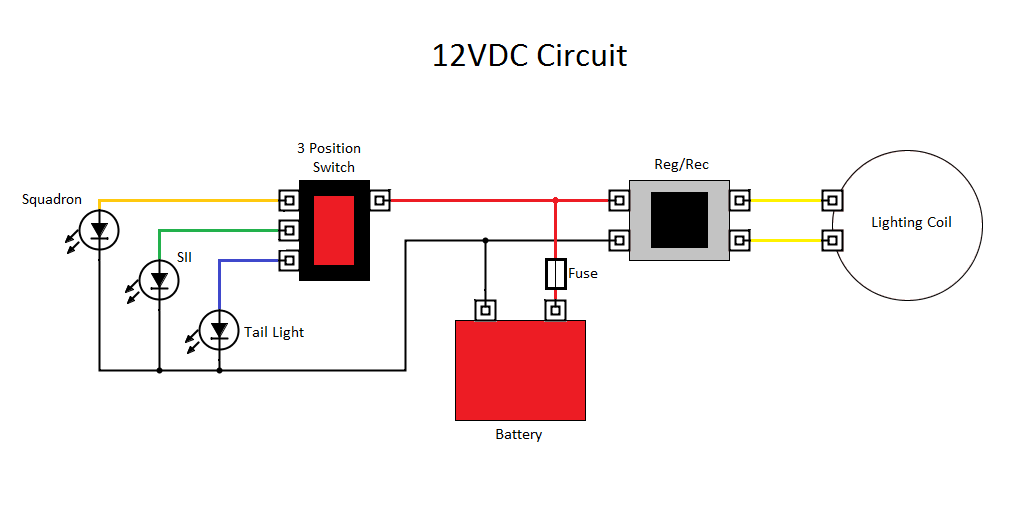
Note the fuse in diagram, I used an MTC fuse holder zip tied to one of the rods on the battery cradle

The wires below will end up being wrapped in Techflex sheathing to keep it together and neater looking.


And here is the finished bike.

Lights Off

Low (SII)

High (Squadron)

Tail Light
Some night shots of the Low on


And a short ride, taken with a GoPro Hero 3 – They don’t do so well in low light, It’s a lot brighter than it appears in the video. If you compare this to the end of the video above showing the X2 Halogen you get a good idea of how much brighter it is.