After seeing this Puch Magnum on Pipe Burn, I started reading up about Magnums on the Moped Army website and decided to look for one. Checked on Craigslist and saw a few that had had some modifications for over $1000 and then found a somewhat beat up, but largely untouched MkII a few hours drive away priced considerably less and picked it up on May 10th 2013.

The issues were –
- Broken speedo
- Broken electrical controls
- Split seat (repaired by previous owner with duct tape)
- Missing spoke on rear Snowflake Rim and a few others chipped
- Loose rear wheel bearings
- Pipe dented/random welds and not attached at rear
- Random replacement cables
- Rust/chipped paint on outside of tank and minor rust on hardware
If it was in excellent condition or even if the paint had been in better shape I would have left it pretty much stock, but it wasn’t – which is good as it gives me a project to make YouTube content so I picked it up and fixed the obvious issues such as the rear bearings etc.
http://youtu.be/3Px-BBBuVbs
Once I had that done I took it for a test ride to get an idea of its performance (32mph and the ZA50 two speed was running well)
http://youtu.be/yPpIN7zlsfk
Planned on repainting and inspecting every part so I did a full tear down – this is the slideshow of that, it took a couple of hours and wasn’t too bad. The right side pedal crank didn’t want to come off the shaft, I ended up (after trying for a while) just removing the left side and sliding it out. I then took an angle grinder to the crank arm to get it off later. They were bent and going to be replaced anyway.
http://youtu.be/dybSzKuyn9s
I bought new shift dampers/pucks from Atomic and sent the crank off to Moped Crank Works to get a roller bearing rod installed.
This is the video of the motors disassembly (I ended up getting an E50 engine instead so the ZA50 is still in pieces).
http://youtu.be/W_Scqsz9U5k
I’m horrible at painting, but I still wanted to do it myself.
Cleaning, Rust removal and Re-Painting of the Frame, Tank and Plastics on my 1979 Puch Magnum.
Steps I used (All materials available from Home Depot, Lowes, True Value & Ace etc – Links are to Amazon as they have more information/reviews)
- Remove Decals with heat gun and scraper (doesn’t need much heat, but lets you remove decals in one piece and have adhesive come with it).
- Remove any loose rust and peeling paint with a wire brush (I used a powered angle grinder for the main work, then a manual wire brush and a dremel for the tight spots).
- Clean with neat (un-diluted) TSP (or TSP Substitute) – Do this step before the wire brush if you need to remove any dirt or oil/grease residue. The TSP de-greases/cleans and also deglosses any good paint that is left on the part to make it easier for the new coats to adhere to.
- Rinse with water.
- Use neat Phosphor Prep and Etch on metal parts to remove remaining rust.
- Rinse.
- Rustoleum “Stops Rust” Clean Metal Primer mixed 50/50 with Acetone. 1 light coat followed by another 2 to get full coverage.
- Rustoleum “Stops Rust” Gloss Paint Mixed 75% Paint with 25% Acetone. Light coat, let flash dry then one full coat to get full coverage. Let dry for 24 hours.
- Use Wet/Dry paper to lightly sand remove any imperfections such as dust/bugs.
- Rinse with Water
- Rinse with Acetone
- Let Dry
- Another coat
- Repeat the above sand/rinse/coat procedure 3x
- Touch up any spots spry gun couldn’t reach with paintbrush.
This gave me a pretty decent gloss finish without any polishing/buffing. I’m going for a Matte look (Not through choice, but because I couldn’t get it to shine…) so I’ll be using 2500 grit sandpaper to remove the few specks of dust in the finish like I did between coats and then rubbing compound to get an even finish.
I’m not happy with the finish – I will be re-doing it, probably with rattle cans as I seem to do better with that. I have vinyl decals that I bought from Raggatron on eBay, but wont be applying them until I repaint.
I used regular automotive wax and it’s protected the gas tank from gasoline just fine so I didn’t bother with a clear coat.
http://youtu.be/kaOhIAD9MCs
As I mentioned earlier, I ended up buying an E50 single speed –
I followed the directions on Moped Army and also checked with the Puch Service Manual for torque values etc.
Bearings are from Amazon. Three regular 17x40x12 and one Snap Ring version. Seals were from Treatland along with the Case Bolt kit. The Teflon E50 Clutch Cover Gasket is from Super Mopeds
Repainted the seat pan and replaced the original seat cover with one from “Miss Tammiecat~” on MopedArmy.
I sped up the painting, grinding parts etc, but the seat cover part is normal speed so its easier to see what I’m doing. First time and I could have got it a bit tighter, but the results are still excellent and I highly recommend Miss Tammiecat – Took about 4 day to receive the cover after I sent a message.
Angle Grinder to get the majority of the rust off the seat pan followed by a dremel wire brush to get in the hard to reach areas.
- Phosphor Prep and Etch from Home Depot to clean up any remaining rust and etch the metal surface for painting.
- Wipe down and let dry.
- Primer coat of Rustoleum Clean Metal Primer (x2).
- Top coat (x2) of what I happened to have laying around (The two paints are compatible, but generally just stick to the same brand as the primer).
- Krylon High Strength Spray Adhesive (model 9090) to attach foam to the pan and then the cover to the foam. It seems to hold very well.
The edging is 6 feet of Item 8451A35, Self-Gripping Plastic Edge Trim with Metal Core from McMaster Carr, but I believe they may have sent me the textured version instead which is Item 8451A63
The edging combined with the spray adhesive seems to make the metal tabs unnecessary so I pressed them flat and did not use them at all.
Put together the Rolling Chassis, Mobil 1 Synthetic Grease and a Wire Wheel and some “Fluid Film” Rust and Corrosion Prevention spray on all nuts/bolts.
Next up was installing the Top End to the rebuilt Bottom. I owe a HUGE Thanks to Benji at Treatland for going out of his way to help me out with this.
Parts used are –
- Treats “puch 70cc 45mm reed valve kit especiale“
- Puch Polini Reed
- Rear facing Weakends Puch Reed kit VM intake,
- Mikuni VM 20mm Round Slide Carb.
I set my ring gap at just a slight drag on a 0.007′ feeler gauge for the upper ring and slight drag on 0.009″ for the lower.
I chamfered my ports a little with a dremel to prevent the rings catching, but no case matching.
I used the Kit Install and Ring Gap Moped Army Wiki Pages to make sure those were installed properly.
Last part shows attaching exhaust studs and Kickstand with spring and finally mounting the Engine in the Frame.
Installed the Pedals onto the Cranks, the Cranks onto the Bike and then sized and installed the Drive/Pedal chains.
The cranks moved from side to side when I got the bike and had even taken a gouge out of the original ZA50’s clutch cover because of it.
I do not know if they had one originally, but I made sure the chain line matched and then made a small spacer from Acetal on my Lathe so stop any side to side play of the crankshaft.
The plastic cog on the original Pedal chain tensioner had worn teeth so I took one from a 10-speed derailleur I had laying around and used new 5mm hardware to attach it.
Using a modern throttle so I cut the old integrated throttle off the Magura lever using a Dremel and then a Mill to tidy it up.
The throttle wasnt long enough with the levers installed as far down on the handlebars as possible for the Oury Road Grips. Made a short extension from Aluminum on a Lathe to take up the empty space that would have been there.
The Mirror was $16 for two from eBay, the bar’s arent thick enough for the expanding bolt to do its job without being overly stressed and it would still be loose at the end due to the end not being tight so I made a bushing for that side.
Cable’s are a bit too long, but the throttle was the only one I have re-sized (for now). Marked and cut the right extension I needed and used a screw on cable stop for the new end.
I will be use cable ties to attach the cable housings to the frame once all the electrical is complete.
Estoril Techno Black Carbon Exhaust, which I bought based mainly on looks and price. If I was doing it again I’d get the side bleed version which offer’s better performance (It wasn’t made at the time I did this).
Came with a clear coat finish which would just burn off at the header so I stripped it and painted with “VHT Flameproof” exhaust paint. I didnt paint far enough up the header so it still burned some of the finish off, I went back and stripped the burnt varnish and added more VHT.
Mounting tab on pipe is for a Maxi frame so I needed to make a bracket. I chose to attach it at 2 points on the frame hanger so it would be a bit stiffer – Used some Vice Parallels to help make some measurements. Put those values into AutoCAD and then exported that DXF file into CamBam+ to create G-code that my G0704 Mill can understand.
One of the lower mounting bolt’s would touch the exhaust so I milled a small recess into the bracket, then cut the spacers to the correct size and tumbled them to deburr and even out the finish.
I didn’t want to use the Stock Points so I’m using a Treats Puch E-50 CDI Complete Adventure Pack – Version 2
Wired per the instructions in the above link and as directed moved the brown wire from the rear to the front and cut down the bolt so it is flush with the back of the stator plate. That stops it hitting the E-50 case preventing full rotation of the plate during timing. I added a zip tie to stop the bundle pulling the connections loose, but you don’t see that in video until I mount the stator to the engine.
I replaced most of the connections with quick connect and soldered any original connections I kept as crimps sometimes come loose/don’t have a good connection.
At this point because my aim is to just make sure the components work and the engine will run I’m connection everything as-is. Once it run’s I plan on going back and making extensions for wires that don’t quite reach, tidying up the wiring/brake cables etc.
The Olympia coil wouldn’t fit in the original coils bracket so I made a new one from aluminum (Sorry that the “making of” it takes up such a large portion of the video, I will add a link to skip it when that point starts).
I’m not using a frame ground, instead I’ll connect all grounds to the ignition coil. When I wire up the lights and any accessories they will all have a ground wire ran back to a common point – which may end up being a Terminal (“Chocolate”) Block under one of the side covers.
Fuel line is Helix Red Transparent – 3/16″ to connect the Tank to the Carb (petcock is designed for 1/4″, but will work with 3/16″ if you use a hose clamp or zip ties – All other parts in that run used 3/16″ plus makes it easier to replace without damaging the plastic tip on the petock) and 1/4″ for section that ties the two sides of the tan together.
Using regular ATF I got from a local automotive store. Fresh Gas (1 Gallon) mixed 50:1 with non synthetic 2 stroke oil (~2.6oz). Plug was gapped to .016″.
Starting just needed a little playing around with the choke and idle screw. Once I got that sorted out it now starts first kick, albeit a little rough and bogs down when given a little throttle. Next video will be setting the timing so I can test ride and tune the carb.
Checked the ignition timing (with Harbor Freight #3343) to make sure it wasn’t way off – With the Stator in the middle of its adjustment the timing starts off around 14 degree’s and with a little bit of throttle advances to 18 degree’s. I dont know enough to change from that right now so I’m going to leave it alone as thats between the Kit value and stock value from the PDF.
This is the link for the Piston Stop I used.
Starting fluid to check for leaks then a short clip of one of the break in rides. Re-checked head bolt torque and then a normal ride to check the jetting. Cylinder and Head temperatures were lower than I expected – Air temp. was about 50 degree’s. Jetting will need adjusting, once I get that figured out I will post numbers.
I’m 240lbs (as you can probably tell in the later parts of the video), bike has 16×40 gearing – max speed was 45mph, with a 30mph average over the 25 minute ride Stock 2 shoe clutch, I have blue springs and an MLM brace I will install – wanted to try stock first. No porting, rpm should be just over 8500rpm based on the Puch E50 RPM and speed chart
Timing Strip and wheel is from the Moped Army
And even though I don’t show it, I used this Break In procedure.
I’d already installed Treats CDI Adventure Pack Version 2 in earlier, but I just rigged it quickly to be able to run the Motor – No lights or anything. If this video misses anything, its probably in that or number 14 (installing the Stator/Magneto and Timing etc). This video is long enough, so I hopefully skipped or edited down anything I’ve already shown in previous ones.
I make an aluminum plate to organize the electrical bits under the side covers of the Magnum. I changed things around so the plate will be different in the video as I make adjustments (and I ended up moving from the included regulator to the full bridge rectifier of the TrailTech so the diagram has a few iterations too).
Then floating the ground on the 12V Coil and running that through a TrailTech 7004-RR150 Regulator/Rectifier with a Bat-Pac Battery Eliminator – the Regulator needs something like the Bat-Pac, Small Battery Pack or a large Capacitor to work properly – it puts out 7v at idle going to 0v at higher rpm without it. With the Bat-Pac it is around 12v at idle, goes to 14v with a little throttle and stays there through higher RPM’s.
I’m using 20W Halogens and bulb adapters for the Headlight and a “vertical fixation RED LED tail light”.
Wire’s are organized with TechFlex, zip ties etc. I do use dialectic grease on the connections (I show it only being applied to the headlight).
My remaining to-do list is just add Decals and a Black LTD front fender and when I can get a welded clutch bell, install the Hammer Clutch.
- Puch e50 CDI complete adventure pack (Magneto, Stator with 12v coil, pietcard CDI ignition box – 2041 etc)
- Bat-Pac
- Trail Tech Rectifier/Regulator
- 12-Position European-Style Mini Terminal Strip
- Pin Terminals for the Strip
- 20w Halogen Bulbs
- Bulb Adapter
- Tail Light at Treats or Amazon
- TechFlex wire loom (I mainly used 3/8″ with a small amount of 1/4″)
- Brake Switch
Installing a Trail Tech on my Puch Magnum, It’s a bit modern for a 35 year old bike but I liked that better than having the original speedometer plus several different gauges mounted to the bike.
Treatland sell the Trail Tech
and I got the 022-SO Basic Triple Clamp Mount with Protector from Amazon
The diagram of the part for the mount will only work with the aluminum protector, hole spacing is different if you just use the display without it.
The speed sensor needs changing, I have about 2mm of chain adjustment before the sensor would hit the rear suspension mount. I will have to remake something that attaches directly to the axle. Will be a better solution as it doesn’t require drilling and tapping of the drum brake and the wheel can be removed with the sensor still attached.
The bolt that I attach to the wheel is just a stock bolt that had a magnet epoxied to it (roughed up both surfaces), and then some heat shrink put around the outside. My camera decided to stop recording after 3 seconds of that bit so it isn’t shown.
Still do to –
- Install Puch Hammer Clutch
- Repaint
- Apply Decals
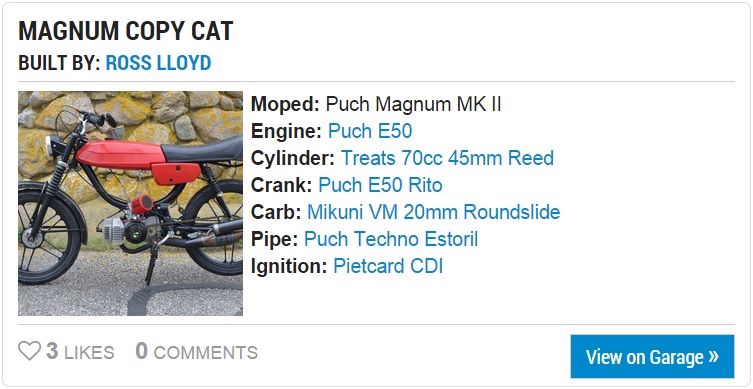
This is the bike as of now on 1977 Garage
https://www.youtube.com/watch?BeVJJBVA